A grow tent that feels warm, smells heavy, or collects moisture on its walls is telling you something: the air is not moving or exchanging fast enough. Light and nutrients get plenty of attention, but poor ventilation can limit plant health just as quickly. This indoor garden ventilation guide explains how to build airflow that supports vigorous growth, keeps humidity manageable and helps your plants make the most of every watt of light.
Ventilation is not simply about putting a fan in the tent. A reliable system removes hot, humid air, brings fresh air into the growing space and gently moves that air through the canopy. Get those three jobs working together and you create a far more stable environment for roots, leaves and flowers.
Why ventilation changes your results
Plants use carbon dioxide from the air during photosynthesis. In an enclosed tent, cupboard or grow room, that available CO2 can drop while heat and moisture rise. The result may be slower growth, soft foliage, stretched plants or flowers that struggle to finish cleanly.
Fresh-air extraction also gives you control over temperature. LED grow lights generally run cooler than older lamp systems, but they still produce heat, particularly in compact tents or during an Australian summer. An extraction fan pulls that heat away before it settles around the canopy.
Humidity is the other major factor. Plants release water vapour through their leaves, especially when lights are on and growth is strong. If moist air sits around dense foliage, fungal diseases and mould become more likely. Good airflow does not replace sensible watering or sanitation, but it gives moisture somewhere to go.
The three parts of indoor garden ventilation
A well-planned system has extraction, intake and circulation. Each serves a different purpose, and skipping one often creates a weak point.
Extraction removes heat and humid air
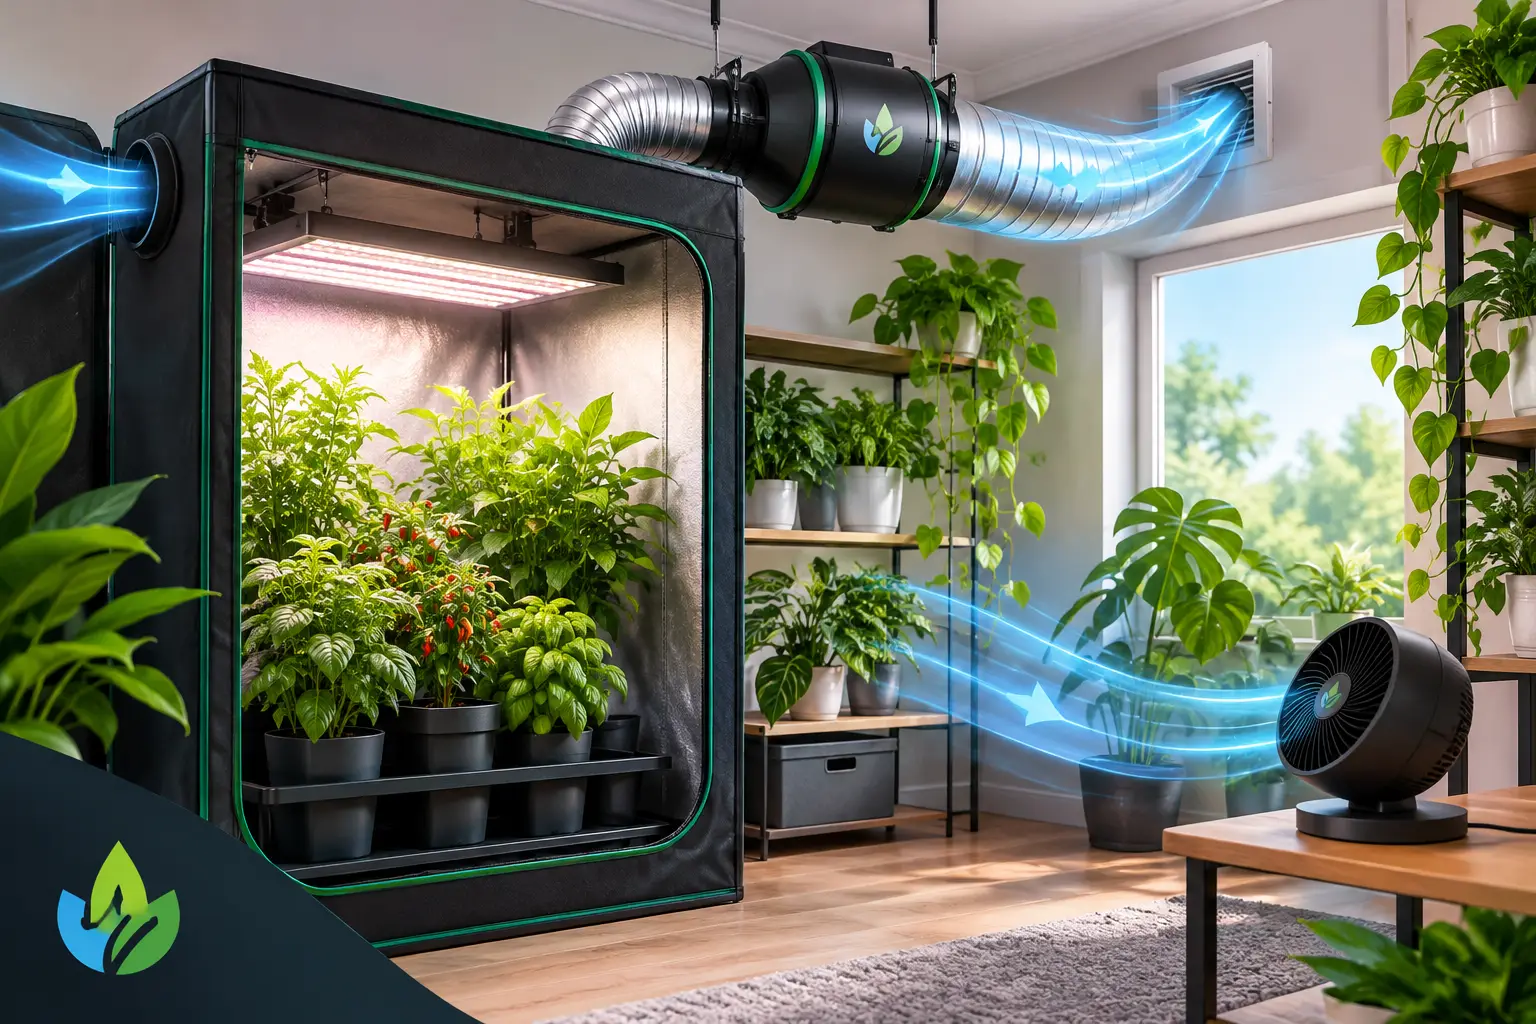
Your inline extraction fan is the engine of the system. It pulls air from the grow space and sends it outside the tent or room through ducting. In most tent setups, position the filter and fan high in the space because heat naturally rises.
Fan capacity is usually measured in cubic metres per hour. Start with the volume of your grow area: length x width x height. A 1.2 m x 1.2 m x 2 m tent has a volume of 2.88 cubic metres. You want an extractor capable of replacing that air regularly, but the final fan size depends on more than tent volume.
Carbon filters, long duct runs, bends, reducers and hot lights all reduce effective airflow. A fan that looks ample on paper can become underpowered once a filter and several metres of flexible duct are attached. For this reason, it is often sensible to choose a slightly larger inline fan and run it at a lower speed. You gain headroom during hot weather and usually reduce noise at the same time.
If odour control matters, connect the carbon filter before the fan so air is pulled through the filter, then exhausted from the tent. Check that all duct joins are secure. A small leak can release odour and reduce the negative pressure that makes a filtered system work properly.
Intake replaces what you remove
As the extractor pulls air out, fresh air needs a way in. Small tents can often use passive intake vents near the bottom of the tent. When the sides pull in slightly, you have negative pressure and air is being drawn through those vents rather than escaping through gaps.
A powered intake fan can help in larger rooms, long duct runs or warm locations where passive vents cannot supply enough air. The intake should generally be less powerful than extraction, or controlled so the space remains under slight negative pressure. Blasting air in without matching extraction can push humid, unfiltered air out through every opening.
Think carefully about where intake air comes from. Drawing air from a cool, clean room is much better than pulling it from a hot roof cavity, dusty garage or area exposed to sprays and pests. In Newcastle and the Hunter, outdoor humidity can also be high after rain or along the coast. On those days, more air exchange alone may not lower humidity enough, and a dehumidifier may be needed.
Circulation prevents stagnant pockets
Extraction changes the air in the room. Circulation fans move air within it. Oscillating fans are ideal because they create a gentle, shifting breeze across the canopy rather than constantly hammering one section of plant.
Aim for leaves to flutter lightly. Leaves that fold, curl or show windburn may be receiving too much direct airflow. Point fans across the canopy or bounce airflow off a tent wall instead of aiming them straight at plants. As plants grow taller and denser, raise or reposition fans so air reaches the middle and lower parts of the canopy as well.
Dense flowering plants often benefit from a second circulation fan below the canopy. This is particularly useful where large leaves overlap and moisture lingers after watering. Keep electrical equipment clear of reservoirs and avoid placing fans where they can blow nutrient solution, coco dust or soil particles around the space.
Set targets, then respond to your plants
There is no single fan setting that suits every indoor garden. Seedlings and cuttings generally prefer gentler air movement and higher humidity than established plants. Mature plants under strong light transpire more heavily, so they often need greater extraction and better circulation.
Temperature and relative humidity should be monitored with a reliable hygrometer at canopy height, not only near the tent floor or exhaust outlet. Many growers also use a thermometer-hygrometer with minimum and maximum readings. It reveals what happens while you are away, including the humidity rise that often occurs during the dark period.
As a broad starting point, keep most actively growing indoor plants in a comfortable temperature range and avoid large swings between lights on and lights off. Humidity requirements depend on species and growth stage, but the key is consistency. High humidity becomes more risky when temperatures fall, airflow is weak or foliage is crowded.
Rather than chasing a perfect number, watch the relationship between temperature, humidity and plant response. If leaves are healthy, growth is steady and the room dries appropriately after watering, your settings are probably close. If condensation appears, the room smells damp or dense flowers remain moist inside, act early.
Manage lights-off humidity before it becomes mould
The most common ventilation issue occurs after lights switch off. The heat source disappears, cooler air holds less moisture and relative humidity climbs. A room that looks fine during the day can become damp overnight.
Run extraction continuously at a lower speed, or use a controller that increases fan speed when humidity or temperature reaches your set point. A dedicated dehumidifier may be the better solution in a sealed room or during wet weather. It adds heat, so it needs to be sized and positioned as part of the whole environmental plan.
Avoid watering heavily just before lights off, particularly in a crowded garden. Allowing the top of the medium to dry to an appropriate level and watering earlier in the cycle gives excess moisture time to leave the room. Good root-zone management supports ventilation rather than asking fans to solve every humidity problem.
Ducting and equipment details that make a difference
Use ducting with the same diameter as your fan wherever possible. Reducing duct size restricts airflow and makes the fan work harder. Keep runs short and straight, with fewer sharp bends. Flexible ducting is convenient, but stretched-out ducting performs better than a long, sagging run with tight kinks.
Insulated ducting can reduce noise and limit condensation where warm, humid exhaust passes through a cooler area. Check carbon filters and pre-filters regularly, as dust build-up reduces air movement. Clean circulation fan guards, inspect duct connections and replace worn duct tape before it fails mid-cycle.
Noise is a real consideration in homes and shared spaces. Fan speed controllers, insulated duct, rubber mounts and correctly sized equipment can make a major difference. Do not quieten a system by restricting the exhaust path. It is better to use a fan with enough capacity to run gently than force an undersized fan to run flat out.
A simple check for a healthier grow space
With the system running, look for a slight inward pull on tent walls, a gentle leaf movement across the canopy and no pockets of stale, humid air. Check temperature and humidity at different times of day, especially shortly after lights off. Then inspect plants closely: healthy ventilation should support sturdy stems, dry foliage and an even canopy environment.
Every growing space has its own heat load, plant density and climate challenges. If you are unsure whether to prioritise a larger extractor, an additional circulation fan, a carbon filter or humidity control, the right choice comes back to your space and your crop. Hunter Hydro can help match the equipment to your tent, room and growing goals, so healthier plants and bigger yields stay simple.
Work through a grow-tent airflow example
Calculate tent volume as length × width × height in metres. A 1.2 × 1.2 × 2 m tent holds 2.88 m³ of air. To calculate the delivered airflow for a chosen exchange interval, use airflow (m³/h) = volume (m³) × 60 ÷ minutes per exchange. At an illustrative one-minute interval, 2.88 × 60 ÷ 1 = 172.8 m³/h.
This arithmetic is a starting point, not a guarantee of temperature or humidity control. The required exchange interval depends on the heat and moisture load, and a fan’s free-air rating is not its delivered airflow through a filter and ducting. Check the manufacturer’s airflow or pressure data for the complete setup, then measure conditions at canopy height. Use our grow tent humidity guide and LED light height guide alongside your ventilation checks.